Happy Day!
 I love coming home to find brown boxes waiting for me at my door
Lets take a look inside!

The GotoNova kit was packed well and arrived in good condition.

There is not much to the kit, and the only complaint I have is the lack of a printed manual. They have pdfs available on the website but that means I have to print out my own if I want a field reference.
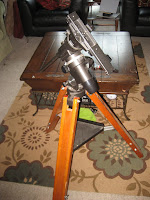
 I have spent some time looking at other folks conversions so I had a roadmap to follow and an idea of how the installation was going to go down. First step is to get the mount out of the garage and get it inside to clean it up and prepare it.
Here is the AC clock drive, the main reason why I wanted to make this conversion. Now I don't need 110v to have tracking.

First step was to remove the old clock drive and hand knobs and check the fit of the RA drive assembly. I encountered several problems with this step.
First, the bolt supplied in the kit was far too short to secure the drive. Second, when the gears are placed on the RA shaft the one on the RA shaft interferes with the RA setting circle. Flipping the gears solved that problem.
Once I had the longer screw installed I had another problem where I could not get the gears to mesh properly. There was not enough clearance to get the gears to mesh without twisting the motor assembly. It wasn't far off so I got a big drill bit and opened the hole up a little

Now I can get the gears to mesh properly and the RA drive is installed.

Of course now I discover that there is some interference with the RA setting circle and the plastic housing on the drive, nothing a jigsaw can't fix :-)
Onto the DEC drive!
I thought this might be a slam dunk compared to the RA but I was wrong.
 The interference from the mount is so bad that the gears aren't even CLOSE to meshing.
It looks like my motor mount is not deep enough to allow the DEC motor to seat properly.
Time to remove the saddle and get out my Dremel

 Its not pretty but its functional and allows the DEC motor to seat properly and mesh with the gears.
Of course now that its installed its time to put the housing back on the drive motor.
But not without some modifications first.
The housing interferes with the saddle in two places.
More Dremel work and a little hacking with a utility knife and we have a finished product.
And now the payoff
This kit was not designed for my mount, but can (obviously) be made to work. It requires a fair bit of tinkering to install. All said and done I think it took me about 6 hours to do which includes a trip to the home improvement store and some trial and error planning.
It seems to work fine, computer control works well however I did have to use a different USB cable as the one that was supplied was substandard and resulted in sketchy performance (the USB device would work then not work then throw errors) I replaced it with a cable I had and it works great now.
Cartes Du Ciel was able to control the scope with ease via the ASCOM software.
Here is the full picasa album with more pics and captions.
Tonight will be first light!
-SS


No comments:
Post a Comment